Here it is, what you've all been waiting for.....sort of, not really. But it's worth it yeah? You can let me know if it was in the comments section :)
Now, on with the show;
I've got about 40 odd orks to paint up within 4 months time, and a Hovertank too....and another project that I'll reveal when it's done. Regardless, I have a fair bit of work ahead of me, but there's nothing quite like a dead line to motivate you is there? :)
Now, even though I like the old RT sculpts, I can get a little bored of some lines.....specifically the orks. There were far too many mono pose, recycled minis in that range. So, when I was gathering all my greenskin's together -for basing & painting- I became a little disheartened at the prospect of applying brush to so many similar minis. Here's where conversion stepped in to saved the day!
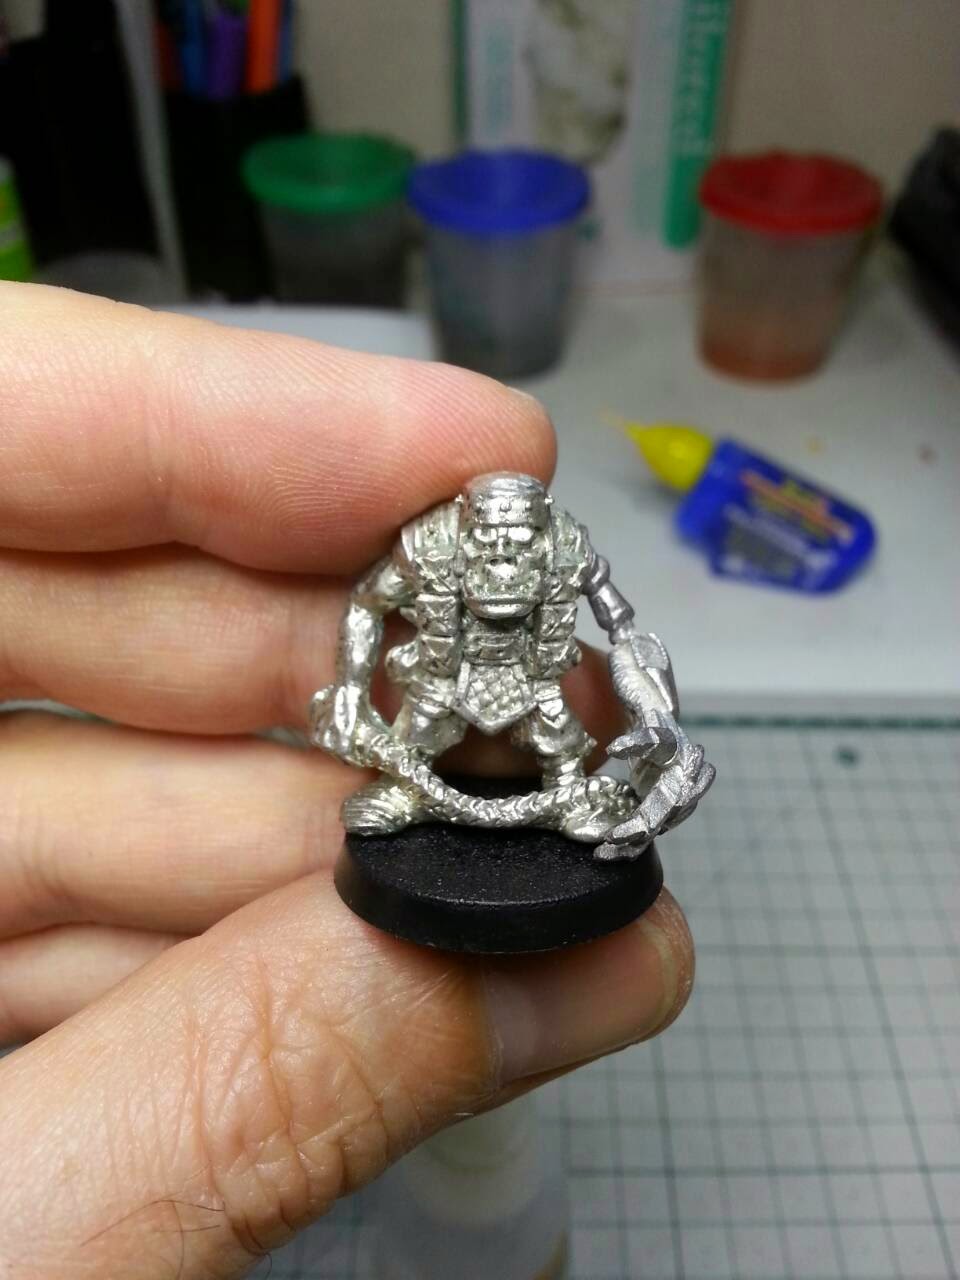
The first in the batch to get the amputation treatment was a red era ork. He was already missing a weapon, but I didn't want to replace it with another, so I cut his whole arm off. I cut his silly little spike off his helmet too.
 |
| Red era, boo, hiss! "Get back ye devil!" |
 |
| Ahh, that makes me feel a little better. |
 |
| Ran some cables along his arm to bulk out his shoulder joint. |
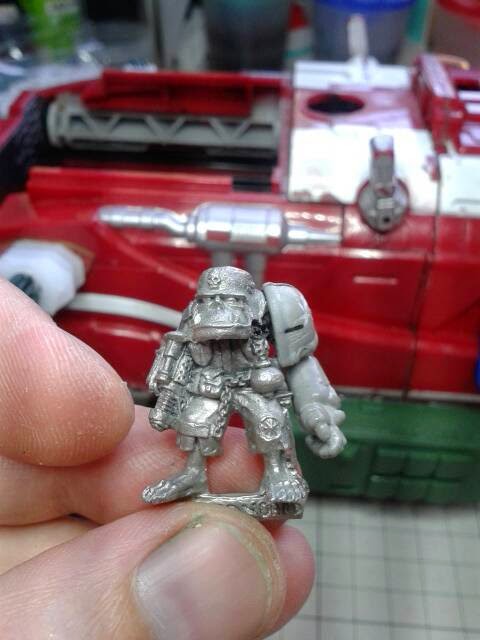
The next one was an old RT standard bearer, but the collection of space marine helmets had already been removed. Good riddance I say! I don't like what GW tried to do with 40k in this respect i.e. transferring command sections from WFB into a futuristic setting. Makes no militaristic sense at all.
So, I cut his arm off! Beginning to see a tend here, when in doubt, just cut the damn thing off! I replaced it with a space marine power first, sort of like he removed it from a dead marine & liked the fit.
 |
| Who needs a standard bearer when we've got walkie talkies? |
 |
| Makes me look tough yeah? |
 |
| Don't worry about the damage, probably doesn't work, but hey, who cares! |
This last conversion was something that only occurred to me a couple of months ago yet it's been starring me in the face for over 25 years. You may be wondering why there is a"run of the mill" space ork raider pictured below. Let me explain;
There's about a gazillion of these type of orks contained within the RBT02 Space Ork Raider's box set. Four Variations on the same mini, yawn!
 |
| Cool mini, but overproduced IMO. |
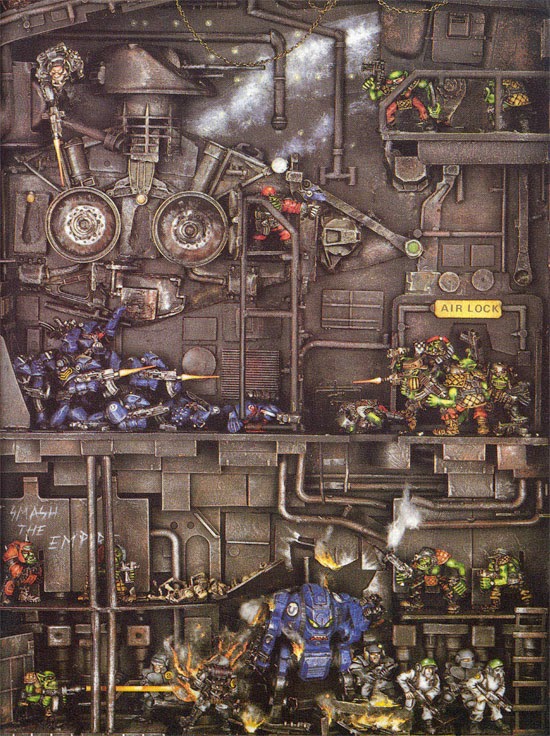
So, I was looking at these guys pondering how I could go about sexing them up. Making them interesting enough so that I wouldn't fall asleep at my painting desk. I started to flick through my old trusty tome for inspiration. And then it hit me, looking closely at one part of Dave Andrews groovy diorama.
 |
| It doesn't get any better than this, period. |
The ork in the bottom left -the one lighting up the trooper & the dreadnought- is using a flamer. But these sculpts never came out with them. So, Dave Andrews (being a clever chap) grabbed a barrel & canister off of an RBT01 marine and bunged them on. The barrel conversion is easy, but the canister/magazine swap is not. The magazine is part of the hand, leg & arm. Removing it to for the canister would have been a pain. So how did he overcame the problem? He stuck it on the side, behind the original magazine (highlighted it to make it more prominent) & left it there to act as a handle, painting it matt black to hide it. You may be thinking "Is this guy for real? How could you not notice that?", but it honestly didn't register.
 |
| See how he hid the mag? |
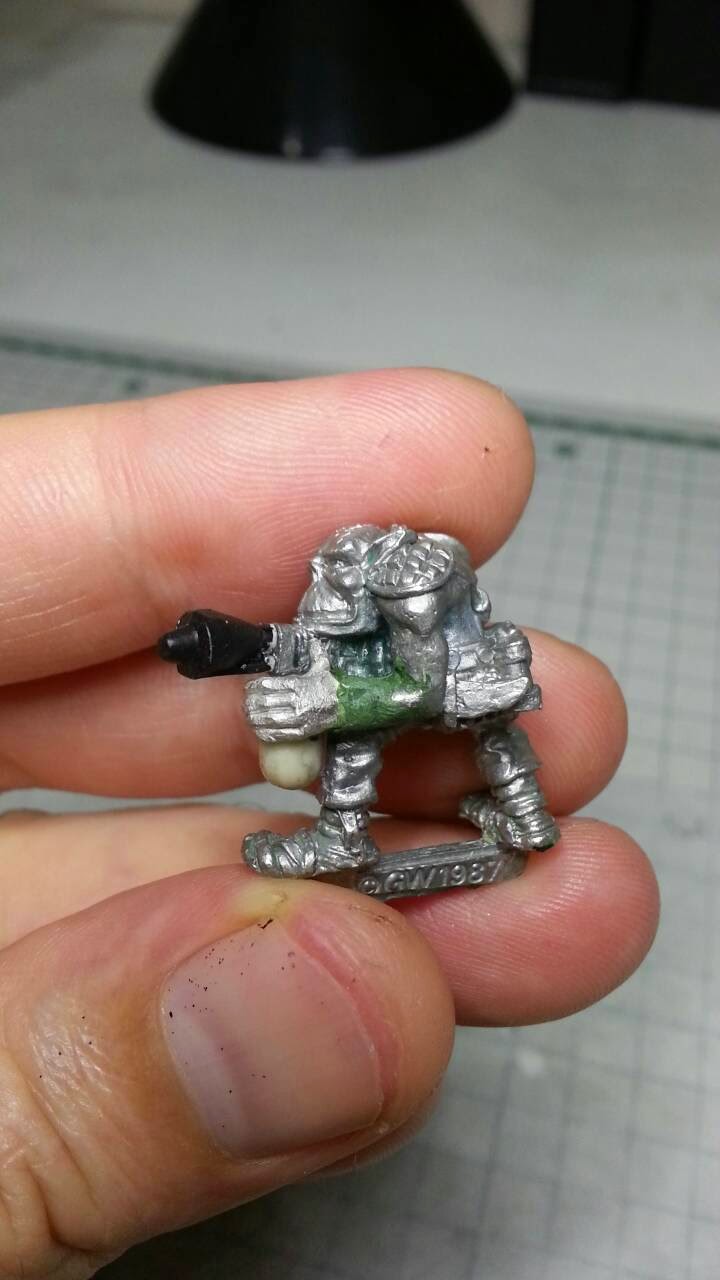
Now, when I originally noticed this conversion I didn't look too closely at the details. I just thought to myself "yeah, that looks great, I can do that!". It wasn't until I cut the magazine off that I realised how he did it. But I'm a stubborn person sometimes, so I didn't give up. I resolved to triumph where Dave Andrews acquiesced :)
 |
| My first hamfisted attempt. |
 |
| Look's great huh? :p |
So, after stuffing it up with my "remarkable" GS skills I decided to ask for some help sourcing a suitable hand. Asslessman on the Oldhammer forum came to my rescue, kindly sending me one of his hands...for free!!! Muchos Gracias JB :)
Here's the result,
 |
| Vast improvement! |
 |
| Look's a whole lot better! |
So (after that lengthy explanation) here's the three of them, painted in monochrome, ready for some B&W wars, only kidding :)
 |
| Smash the empire!!! |
Now I just have to paint up this horde & they'll be ready to kick in marine heads all day long.
Good bye to you all :)


